



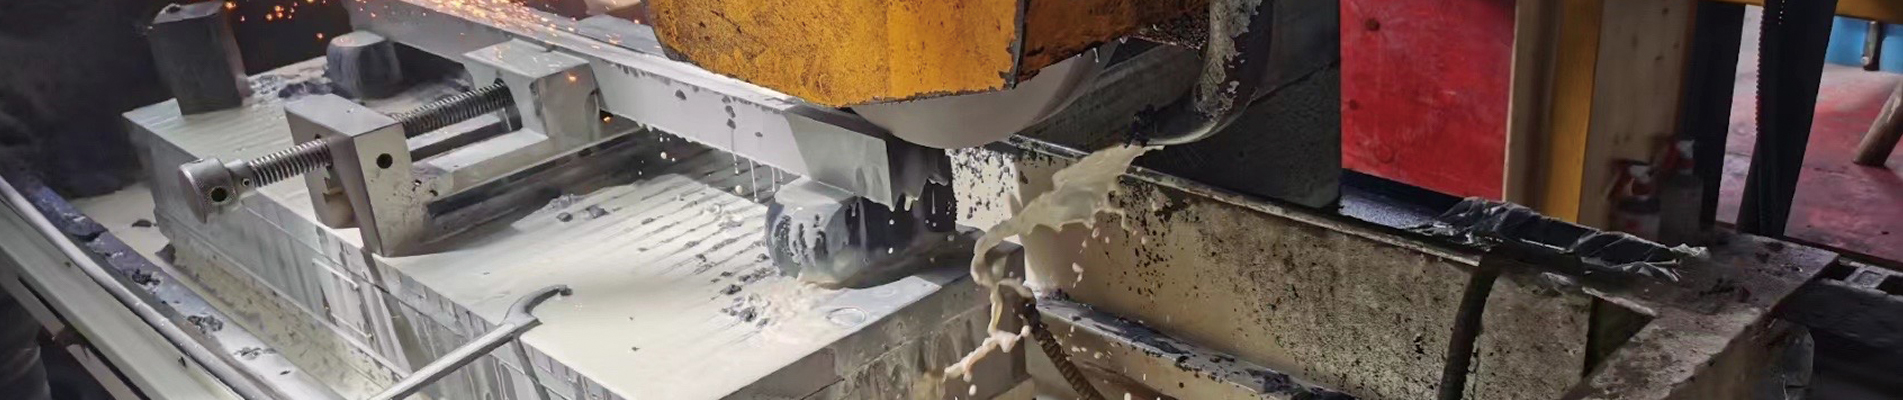

A paper roll can look perfect before it enters a slitter rewinder and emerge with fuzzy edges, loose fibers, coating debris, or poorly wound narrow rolls. The immediate reaction is often to replace the knives. Sometimes that works. Frequently, however, the new paper slitter knives produce the same defects because the actual cause is excessive overlap, incorrect side force, worn lower knives, unstable web tension, an unsuitable blade profile, or a change in the paper itself.
For paper mills, printers, label converters, corrugated-board plants, and packaging manufacturers, the consequences extend beyond appearance. Loose fibers can contaminate printing equipment and finished products. Rough edges may contribute to web breaks, inaccurate slit width, winding defects, rejected rolls, and repeated cleaning stops. The best troubleshooting approach therefore connects edge appearance to cutting mechanics and verifies the result with a repeatable production test.
This guide explains how to diagnose paper dust slitting, paper edge fraying, ragged board cuts, and premature knife wear. It compares shear, score/crush, and razor cutting; examines knife materials and geometry; provides practical inspection tables; and shows how to specify replacement paper slitter blades for a commercially sustainable result. Where numerical guidance comes from an equipment manufacturer or technical publication, its scope is identified. There is no universal overlap, angle, hardness, or blade-life figure that applies to every paper grade and machine.
Quick answer: When paper edges become dusty or fuzzy, inspect the defect pattern first, confirm that the upper and lower cutting elements are sharp and correctly mounted, then verify overlap, side force, cut-point location, web support, and winding conditions. Use the minimum machine-approved engagement and force that maintain a continuous clean cut. If the system is mechanically sound but the problem persists, compare the knife profile, edge finish, material grade, and paper properties under controlled trial conditions.
A slitting knife influences several costs at once. It affects the acceptable length of finished web, operator intervention, cleaning time, tool inventory, and the timing of regrinding. On a high-output line, a modest decrease in accepted production can exceed the difference between a cheap blade and a better-engineered replacement. On a lower-volume custom converter, preventing one damaged customer roll may be more important than increasing maximum running speed.
Edge quality is also a process-interface problem. A roll of paper with an uneven edge may unwind poorly during printing, coating, folding, or laminating. Released fibers can become specks or debris downstream. Sappi's technical bulletin on specks in printing describes how rough trimming and slitting wheels can generate contamination, and why the edge produced on the bevel side of a cutter can differ from the edge on the opposite side. This is useful evidence that a clean-looking blade body is not proof of a clean cut.
Converting operations also handle very different substrates under the word “paper.” Thin tissue, printing paper, coated label face stock, kraft liner, release paper, solid paperboard, and corrugated material do not respond identically to a cutting wedge. The fiber structure, density, surface coating, adhesive layer, moisture history, thickness, and winding tension all affect the result. A blade optimized for one product may be a poor choice for the next even when both are described as 150 g/m² paper.
For procurement teams, the commercial objective should be written as an acceptance condition: stable slit width, acceptable edge fuzz and dust, planned knife service interval, reliable mounting fit, and total cost per accepted roll or kilometer. A purchase order containing only outside diameter, bore, and a steel grade does not fully specify these outcomes.
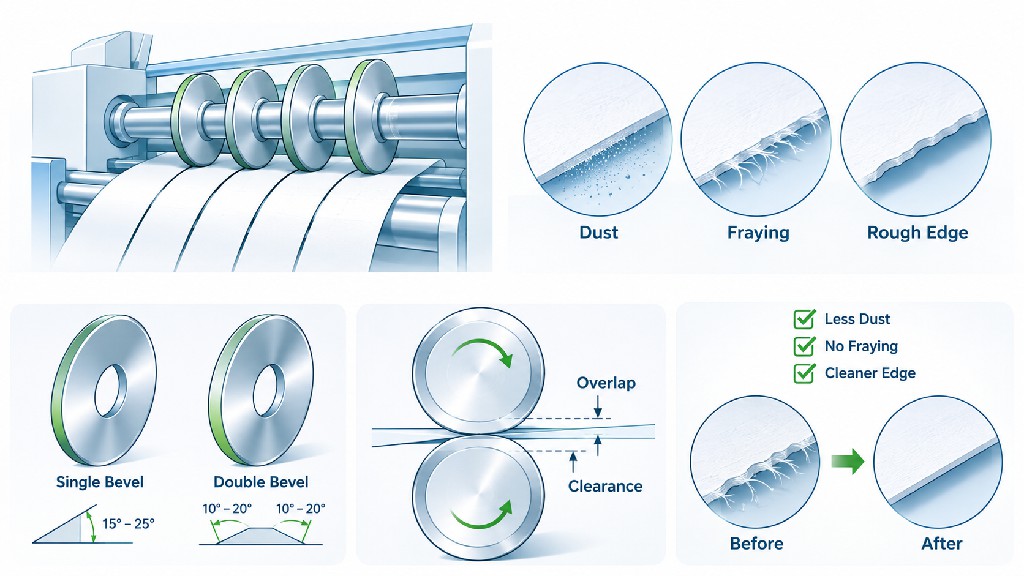
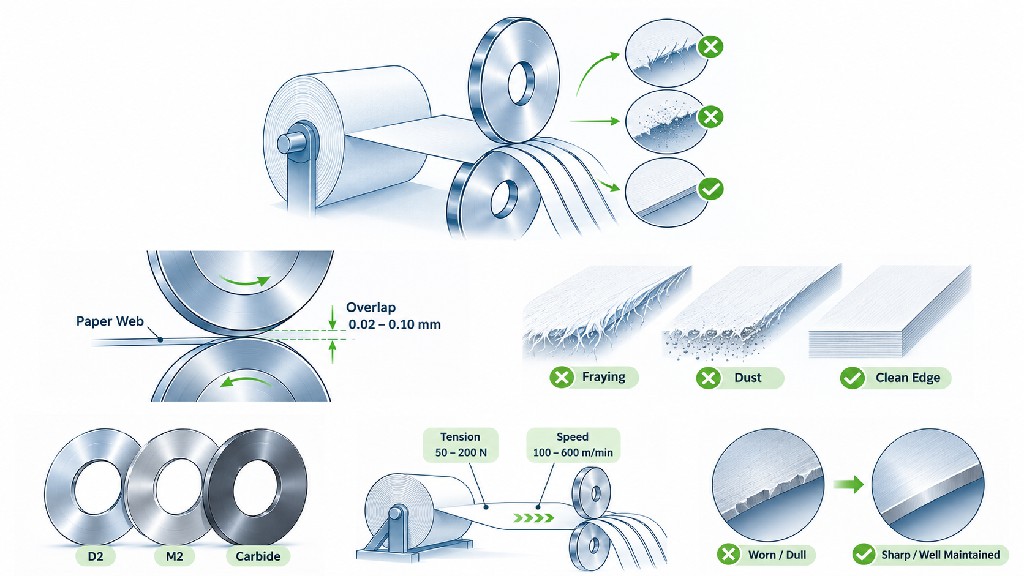
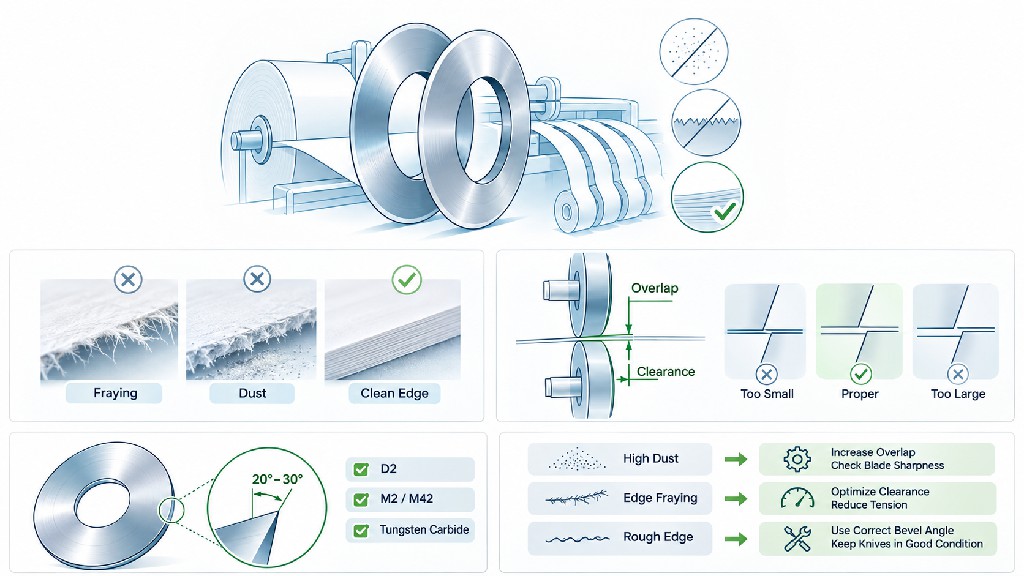
The visible defect is the first diagnostic clue, but different mechanisms can produce similar appearances. “Dust” is usually the detached fine fiber and filler or coating particulate generated at or near the cutting point. “Fraying” describes fibers that remain attached and project from the new edge. A rough or feathered edge may contain both. A crushed edge shows densification or distortion of the web. A board edge may delaminate between plies even when the outer faces look relatively clean.
Examine samples from both sides of the slit, not just the finished roll that happens to be easiest to reach. In shear slitting, the two newly created edges are not always geometrically equivalent because the upper knife, lower knife, and bevel face interact differently with each side. A difference between left and right edges can help identify orientation, contact geometry, or side-load problems.
| Observed symptom | What it may indicate | First checks | What to record |
|---|---|---|---|
| Fine powder along every slit | Contact or abrasion across the whole setup; substrate coating or filler | Overlap, side load, knife finish, paper grade | Dust per measured web length and machine settings |
| Long attached fibers or fuzzy edge | Dull edge, unstable cut point, inappropriate profile | Edge condition, holder stability, web support | Fiber-length severity and affected lanes |
| One lane dusty; adjacent lanes clean | Local knife-pair, spacer, or holder fault | Upper/lower pair, runout, seating | Lane number and knife identification |
| Repeating notches at a fixed interval | Rotating element damage or eccentricity | Chipped circumference, radial/axial runout | Repetition distance and rotation relation |
| One side of slit consistently worse | Asymmetric profile or edge interaction | Knife orientation, mating face, relative position | Separate left/right edge photographs |
| Board layers peeling apart | Material bond weakness or excessive compression | Ply adhesion, crush force, support, blade profile | Delamination length and board grade |
| Quality deteriorates after a long run | Progressive edge wear, pickup, thermal or paper change | Blade condition and incoming roll history | Accepted meters or hours since last grind |
This table is a troubleshooting framework rather than a laboratory diagnosis. For example, paper dust on one lane can arise from a defective knife, but it can also come from a localized trim-extraction nozzle that pulls fibers across that lane. Confirm the cause with an isolated change rather than immediately ordering new blades.
A clean shear cut separates fibers in a relatively narrow zone. Dust increases when the paper is rubbed, crushed, repeatedly flexed, or torn over a longer contact path. The top blade may scrape the web before the intended cut point, or excessive penetration may force the newly separated edges to travel against the beveled blade face. A damaged cutting edge can pull fibers rather than sever them consistently.
There are three useful mechanisms to distinguish. First is cutting-related fragmentation: fibers, filler, and coating particles detach during the intended separation. Some amount is inherent to processing paper. Second is avoidable mechanical abrasion: the paper travels too far in contact with the rotating blade, lower knife, spacer, or machine surface. Third is secondary contamination: previously created dust is redistributed by airflow, inadequate extraction, electrostatic attraction, or contact with downstream rolls.
DIENES identifies setup, knife geometry, cut point, shear angle, and runout as contributors in its technical discussion of slitting dust. It also notes that completely eliminating dust is not a realistic promise for every material and cutting method. That distinction matters commercially: a supplier can help reduce dust and improve repeatability, but a guaranteed zero-particle claim requires a defined test method and application-specific evidence.
A particularly important mechanism is the length of web contact with the upper knife bevel. DIENES explains that excessive overlap extends this contact path. In its overlap analysis, a 0.020-inch increase over its comparison condition produced an approximately 41% increase in travel-chord length; a larger increase of 0.060 inch produced an approximately 102% increase. Those are geometry examples from that analysis, not measured increases in dust mass or universal machine performance figures. They demonstrate why “more overlap for a stronger cut” can make the problem worse.
Dust that appears immediately across all lanes suggests a setup, substrate, or unsuitable knife-geometry issue. Dust that rises gradually with production length suggests edge dulling, buildup, or changing operating conditions. A sudden jump during an otherwise stable run may indicate a blade chip, trim-handling fault, web tension upset, or a different roll of material. Make the time pattern part of every maintenance report; without it, teams can easily mistake a process change for poor blade manufacturing.
Coated printing paper, thermal grades, and filled paperboard may release particles with different origins. A white powder can be mineral filler or coating debris rather than only cellulose. Check a known clean sample, inspect both sides under magnification, and involve the paper supplier if the dust changes with lots. Upgrading to a harder knife will not necessarily fix a poorly bonded coating or an unusually abrasive filler package.
Many converting lines use rotary shear slitting, in which an upper knife works against a lower knife or anvil ring to create a scissors-like cut. Other machines use crush or score cutting, where a circular blade presses against a hardened surface, or razor slitting, where a fixed or moving razor separates a web. The names describe different stress mechanisms, and their failure modes must not be treated as interchangeable.
DIENES describes shear cutting as widely applicable to paper, cardboard, paperboard, labels, films, and other materials, with strong potential for edge quality and low dust when the geometry is correct. It also discusses exceptions for extremely light papers, heavy multilayer webs, and applications that benefit from powered top knives. This supports selecting the method according to the material rather than automatically specifying the sharpest available circular tool.
| Method | Working principle | Potential advantages | Main failure risks | Typical evaluation question |
|---|---|---|---|---|
| Rotary shear | Two overlapping cutting edges shear the web | Precise edges, broad paper applicability, high-speed capability | Overlap, side force, cant, and alignment errors | Is the upper/lower knife pair correctly matched? |
| Score or crush | Knife compresses material against an anvil | Simple architecture; can suit selected boards and constructions | Compression damage, fiber crushing, anvil wear | Does the product tolerate the required compressive force? |
| Razor | Sharp edge separates web primarily by tensile action | Compact arrangement, useful for approved thin substrates | Tearing, edge wear, unsupported web, snagging | Does web tension and support prevent tearing? |
| Powered shear or specialist cut | Controlled drives and specialized contact geometry | Can help sensitive or heavy grades in suitable systems | Greater complexity; compatibility requirements | Is the machine designed and approved for this method? |
A change in cutting method is an engineering project, not merely a blade swap. It may require different holders, guards, drives, waste extraction, and web-routing hardware. For replacement orders on existing machines, first restore the OEM-approved method and isolate the defect before proposing a conversion.
A rotary slitter blade is defined by much more than its diameter. The outside diameter (OD) controls the location of the cutting edge relative to the machine; the inside diameter (ID) and bore tolerance determine fit on the mounting shaft or cartridge; the blade thickness and contact-face geometry affect rigidity, cut-line position, and friction. The edge profile defines the active cutting wedge, while flatness, parallelism, concentricity, and runout determine whether it remains in the intended position during rotation.
Paper-converting upper knives may be dished, hollow-ground, flat, or compound-beveled. Lower knives may be precision rings, grooved elements, or mating discs. The correct working face and rotation direction must be explicit. An upper blade with the right OD but the wrong relief or bevel orientation can scrape the paper, increase edge deformation, or contact the lower knife incorrectly.
GUANG CHUAN's top and bottom slitter knife guide explains the different functions of a matched shear-cutting pair. Its paper-converting top and bottom knife product range also illustrates why buyers should order by operating geometry and drawing rather than catalog label alone. For general terminology, see the manufacturer's circular slitter knives selection guide.
The smallest included angle is not automatically the sharpest or most durable production knife. Sharpness concerns the condition of the actual tip: its microscopic radius, absence of burrs, continuity, and surface finish. Bevel angle and secondary relief describe how the material behind the tip is shaped. A very acute tip may enter paper easily but fail early if the holder is unstable; a stronger edge can be more reliable if its relief keeps contact area low.
The distinction is also emphasized in Peter Wood's TAPPI conference paper on optimizing shear slitting, which separates sharpness and blade profile from cant angle, overlap, side force, nip velocity, geometry, and trim removal. When requesting a replacement, specify the edge cross-section and the location of the working face. Do not substitute the machine's cant-angle number for the knife's ground bevel angle.
In rotary shear slitting, overlap is the amount by which the upper knife edge projects beyond the tangent reference at the lower knife or anvil. It establishes a cut point and accommodates operating motion. Too little overlap may allow the knife to jump or the cut to become intermittent; too much increases blade-to-web contact and can shorten knife life. The correct setting is governed by the holder, knife diameters, web path, speed, and paper characteristics.
Published reference values are useful only with their context. DIENES discusses approximately 0.030–0.040 in (0.76–1.02 mm) as a general guideline in its particular explanation of shear slitting and dust. Tidland's Performance Series knifeholder procedure uses 0.030 in (about 0.8 mm) as its specified starting setting, explicitly stating that some web products may need more or less; its operating manual should be followed for that equipment. These are not cross-industry mandates and should never override another machine builder's instructions.
| Published reference | Numerical information | What it actually describes | Why it is not a universal setpoint |
|---|---|---|---|
| DIENES overlap discussion | Approximately 0.030–0.040 in (0.76–1.02 mm) | General shear-slitting guideline in a dust/contact analysis | Knife profile, material, holder, and web path vary |
| Tidland Performance Series manual | 0.030 in (about 0.8 mm) | Initial overlap for a specific holder procedure | Manual allows exceptions according to material |
| DIENES travel-chord comparison | +0.020 in overlap associated with about +41% chord length in its model | Geometric example of increased web contact | Not a dust-mass reduction or production guarantee |
| Machinery-specific commissioned recipe | Set by the OEM and validated process | Approved machine operating window | Must be checked after changes in tool or paper |
Use a safe, repeatable adjustment process. Stop the machine, isolate hazardous energy, and follow the knifeholder manufacturer's specified retraction and adjustment procedure. Inspect that blades are seated and that the lower ring does not wobble. Record the existing overlap before moving anything. Then make one controlled adjustment within the approved range and compare both slit-edge quality and dust collection over an equal web length. If the cut becomes intermittent at a smaller engagement, do not force the adjustment lower: diagnose holder play, web instability, or knife profile and return to a safe approved setting.
A related mistake is to use overlap as compensation for a worn blade. A rounded edge may require more mechanical disturbance to separate fibers, but a deeper overlap increases contact area without restoring sharpness. If wear is the cause, regrinding or replacing the knife is normally the more rational corrective action.
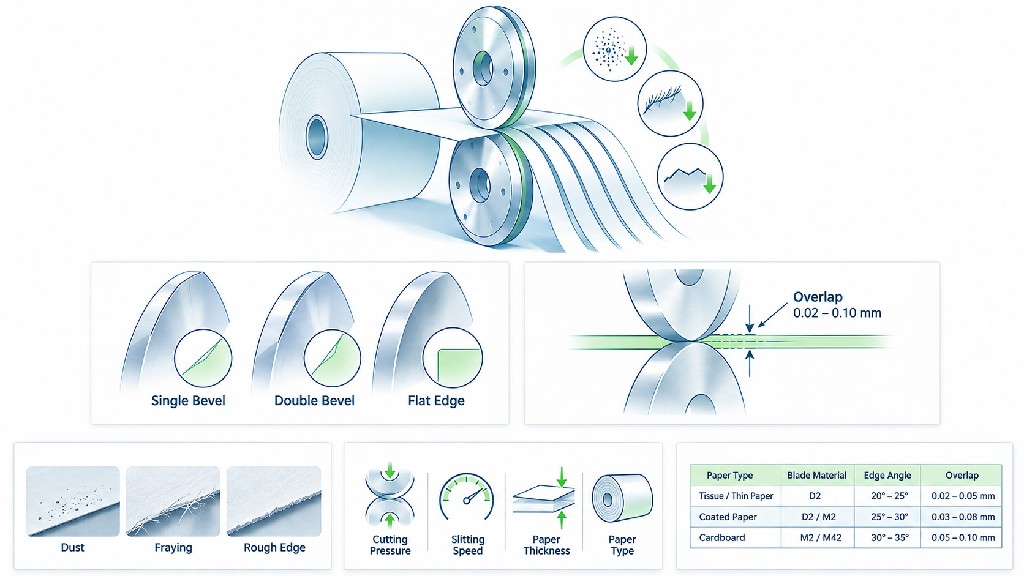
Four settings deserve separate names because operators sometimes group them together as “knife pressure.” Side force is the lateral contact load pressing the top blade toward the lower cutting face. Cant angle is the angular orientation of the upper knife relative to the lower knife. Clearance or nip condition concerns the relationship of the functional cutting faces, depending on the holder design. Cut-point geometry describes where the web meets the paired edges and how it is supported at separation.
More side force does not necessarily make a cleaner cut. Excessive loading can accelerate wear, score the mating surface, deform the blade, and generate fibers. Insufficient loading can leave the nip open or allow a knife to ride out of contact. On equipment with regulated pneumatic or electronic side force, establish a manufacturer-approved window and document the actual setting, rather than copying a pressure value from another knifeholder model.
Cant angle likewise is not a universal “more is better” control. Its purpose is to maintain a dependable scissors-like nip without unnecessarily increasing rubbing. A small setting change can influence wear and dust differently with different profiles. Check the installed orientation against the holder documentation. If the cutting edge and lower ring are not meeting at the expected point, inspect mounting alignment before adjusting force.
The cut point should be supported so that the moving web reaches the intended shear nip rather than being contacted early by the upper blade. A freely fluttering web can be cut by repeated impact or sawing. DIENES discusses this in its cut-point and shear-angle explanation. Tidland's technical material also distinguishes tangent and wrapped web paths. A recipe from a tangent-slitting machine cannot always be transferred unchanged to a wrapped configuration.
To help engineers separate the variables, GUANG CHUAN provides a focused clearance, overlap, and side-force setup guide for paper, film, and foil and a more detailed knife-overlap troubleshooting article. Use these alongside the OEM procedure rather than treating generic examples as machine certification.
A newly ground knife can still create poor edges. The grind may have left a wire burr, an inconsistent tip, a local chip, or coarse scratches along a surface that contacts the paper. Those defects can act like tiny hooks that catch fibers. An otherwise appropriate HSS knife will perform badly if the cutting edge is damaged during transport, installed against a contaminated seat, or resharpened without restoring the original geometry.
The Tidland knifeholder manual stresses removing burrs, making the blade edge as smooth as practical, and following a defined grinding and deburring procedure. TKM's paper knife dust troubleshooting article likewise identifies grinding errors, chips, the wrong knife pairing, unsuitable geometry, and dimensional tolerances as causes of unacceptable cutting. These are independent technical reasons to treat sharpening quality as an inspected deliverable rather than a simple workshop task.
After removing a knife with the machine safely locked out, inspect the full circumference under appropriate magnification and lighting. Check for continuous reflection from a rounded tip, chips, corrosion, adhesive buildup, heat discoloration, and asymmetric wear on the contact face. Use a protected inspection fixture where appropriate; never test sharpness by dragging a finger along the edge. Compare the blade to its approved profile and minimum dimension before committing it to another grind.
A professional regrind should restore the intended cutting land and relief, control edge concentricity, remove grinding burrs, and document the finished diameter. If a supplier cannot explain the reference face or reproduce the required section drawing, its stated hardness alone is not enough evidence of compatibility. An unverified “extra sharp” profile can reduce local tip strength and lead to premature chipping.
A properly sharpened knife cannot compensate for a paper web that moves unpredictably through the cutting zone. Low or fluctuating tension permits flutter, lateral wandering, wrinkles, and intermittent support. Excessive tension can promote tearing, stretching in suitable grades, and web breaks. The practical objective is stable transport at the cut point and controlled winding tension downstream, not the highest tension the web can tolerate.
Inspect unwind brakes, tension transducers, load-cell calibration, dancer movement, driven rolls, and guiding correction. Look for trends that coincide with the defect: an oscillating tension signal, an edge that drifts laterally, or dust that rises when the rewinder accelerates. A trial at a reduced approved speed can help reveal whether vibration or dynamic web movement is involved. Speed reduction is a diagnostic step, not proof that the knives are intrinsically unsuitable for normal production.
Relative surface velocity at the lower anvil is another machine-dependent issue. Some driven lower-knife systems are intentionally operated slightly faster than the web. Tidland guidance cited in the Performance Series troubleshooting reference discusses an overspeed setting of 3–5% in a particular driven-anvil configuration; TKM describes approximately 5% as common in many of its paper-cutting applications. These values apply to those arrangements and are not instructions for a freely rotating lower ring or a machine with a different drive topology.
If driven-ring speed is changed, confirm the correct reference velocity and monitor both dust and frictional wear. Excessive differential speed can abrade the paper or damage the edge; too little can destabilize certain cuts. Use the machine builder's validated settings and consider whether the lower ring, rather than the upper knife, has a mechanical speed or bearing problem.
A production team can often identify the leading cause without replacing an entire knife set. The key is to preserve evidence, compare lanes, and change only one controlled variable at a time. Begin by taking a sample before any adjustment; photograph it under consistent light with a scale, label the lane number, and note the paper batch. Record machine speed, tension, overlap, pressure or side-force setting, tool identification, and current run length.
First, classify the defect. Is it loose powder, attached fibers, a wavy edge, or crushed board? Does it affect all lanes or a single lane? Is it visible immediately at the slit or only after winding? Dust first appearing at the rewinder may indicate roll rubbing or trim flow instead of the primary cut.
Second, verify the incoming material. Compare an uncut section with a previous good lot. Record grammage, thickness, coating, moisture data where available, splices, and any visible contamination. If the problem changes exactly when the paper lot changes, keep the blade setup fixed while comparing substrate samples.
Third, inspect machine mechanics safely. Check holders, bearings, seats, spacers, lower-ring condition, guard integrity, and documented shaft alignment. Measure runout where equipment and procedures permit. A chipped knife or an eccentric lower ring may explain a repeated defect better than any process adjustment.
Fourth, restore the approved baseline. Confirm the correct upper/lower orientation, overlap, cant, and side force for that machine. Verify the web is supported at the cut point and that extraction nozzles and trim handling are not disturbing it. Make a controlled test of one variable only after defects and safe operating limits have been recorded.
Fifth, decide whether the blade itself is the limitation. If the same pair causes trouble after setup correction and adjacent pairs perform well, compare the actual profile and condition. Regrind an appropriate structurally sound knife or install a verified matching replacement. Then rerun the same material, speed, and sampling interval to confirm the improvement.
| Diagnostic pattern | Most useful isolation test | Potential corrective direction | Avoid this shortcut |
|---|---|---|---|
| All lanes dusty after a setup change | Restore documented baseline | Recheck overlap, tension, and web geometry | Buying harder knives immediately |
| Single lane fuzzy from startup | Compare that knife pair with a known-good lane using approved procedures | Inspect local holder, mating knife, and profile | Increasing global side force |
| Dust increases as knife runs | Compare edge before/after controlled length | Sharpening, improved grade, cleaning or finish | Hiding the defect by adding penetration |
| Repeating edge marks | Correlate pitch with rotating components | Runout, chip, bearing, or mounting repair | Changing paper supply without evidence |
| Defect only on new paper lot | Paired material trial with unchanged settings | Paper conditioning or application-specific profile | Rewriting the whole machine recipe blindly |
| Debris concentrated near trimming | Observe trim capture and path | Correct extraction and trim removal | Directing strong airflow into the cut point |
The final decision should be documented in a short deviation report. A successful adjustment is one that produces a repeatable improvement during the actual production duty, not merely a cleaner ten-second sample at reduced speed.
Paper edge fraying usually means some fibers are being bent, drawn, or pulled out instead of being severed cleanly. Start by examining the difference between the two sides of the cut. Fine short fibers concentrated on one side may be consistent with the way the upper bevel displaces the web. Long attached fibers along both sides may point toward a rounded edge or unstable nip. The pattern is indicative, not definitive: magnification and controlled comparisons are still necessary.
An overly blunt local wedge may disturb a broad zone of paper before the fibers separate. A very thin edge, on the other hand, may lose its form under excessive side load or impact. The goal is a correctly supported tip with suitable relief, not the smallest possible bevel angle. GUANG CHUAN's slitter knife bevel-angle guide explains why included edge angle, primary land, hollow grind, and holder cant must be specified separately.
A frequent cause of fraying is poor registration between upper and lower knives. A worn or grooved lower cutting face can leave part of the paper unsupported. A mismatched replacement can make the top blade rub instead of shear. Unequal spacer thicknesses can also shift the cut line and alter contact. When one edge is consistently worse, check knife orientation and the mating face before modifying the blade steel.
For highly sensitive grades, inspect web support before and after the nip and consider whether a specialist holder or powered shear arrangement is appropriate. Such changes require OEM evaluation. DIENES notes that very light paper and certain thick multilayer constructions can be difficult for passive shear knifeholders; its shear-cutting explanation provides the relevant application context. Improving fraying often involves the complete cutting architecture, not only a new knife.
Cardboard slitting blades face a different mixture of wear and quality challenges. Folding boxboard and solid board may contain several plies, coatings, and recycled fibers. Corrugated board adds liners and a fluted structure, with edge quality influenced by compression, flute direction, adhesive bonding, and where the cut passes relative to the corrugation. A visually rough edge may result from delamination or collapse instead of a purely blunt cutting tip.
For corrugated products, record the board construction and flute orientation as carefully as the nominal thickness. Compare cuts parallel and perpendicular to the relevant structural direction where applicable. Assess whether the blade crushes a flute before cutting it, whether the bottom support is appropriate, and whether the machine was designed for longitudinal rotary slitting or a different operation. A paper-rewinder shear knife should not be assumed interchangeable with a corrugated-board slitter-scorer knife.
Heavy board and abrasive recycled stock can increase edge wear. Stronger edge support or a different material may be needed, but excessive wedge thickness can also increase compression. The most useful supplier conversation therefore includes a board sample, the existing blade's section drawing, photographs of both cut faces, desired slit width, and expected running speed.
GUANG CHUAN lists high-precision HSS circular cardboard slitting blades for paper converting and corrugated applications. That product page lists configurable steel grades and tight published tolerances, but actual eligibility for a particular corrugated line must still be confirmed against its approved drawings, mounting arrangement, and cutting method.
A paper's grammage tells you its mass per unit area, not the complete cutting behavior. Two products at the same grammage may have different thickness, density, fiber composition, filler content, bonding, coating, and moisture history. As a result, a knife that cuts one paper with low dust may roughen another. To distinguish a tooling issue from a substrate issue, record more than a single “GSM” value.
The published standard ISO 536:2019 provides a method for determining paper and board grammage. ISO 534:2011 addresses thickness and associated density calculations for its defined paper/board scope; it does not cover corrugated fiberboard or tissue under that method. ISO 287:2017 describes moisture-content determination for paper and board lots by oven drying, subject to its applicability conditions. These are test-method references, not prescribed “ideal moisture,” “ideal thickness,” or slitting settings.
| Substrate detail to request | Why it affects a slitting trial | Suggested evidence |
|---|---|---|
| Grammage (g/m²) and measured thickness | Separates mass per area from mechanical section | Mill certificate or controlled measurement |
| Coating type and coat weight | Can contribute different particles and wear | Grade specification; dust sample description |
| Fiber furnish and recycled content | Influences abrasion and fiber pullout | Supplier description; controlled lot comparison |
| Moisture and conditioning history | Can affect dimensional stability and web behavior | Sampling method, date, ambient conditions |
| Surface treatment or adhesive | May increase pickup and transfer | Cross-section, product specification |
| Web width, slit width, and roll diameter | Changes trim, support, and winding demands | Production order and machine recipe |
Do not invent a universal moisture-content range for paper slitting. The suitable condition depends on grade, supplier specification, storage, and the next converting process. If moisture is suspected, work with the paper producer's quality team on a controlled comparison instead of conditioning an entire shipment without approval.
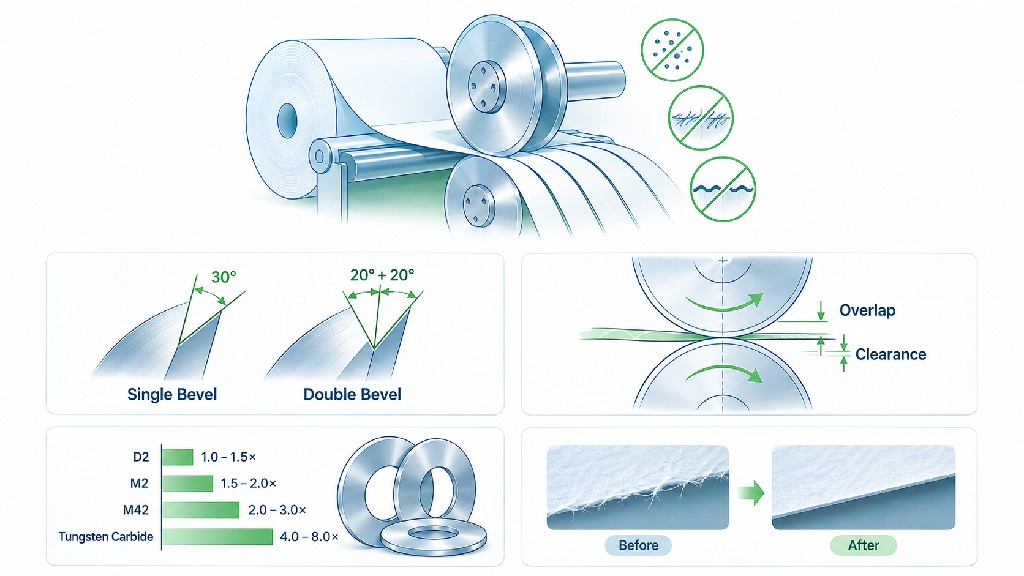
The label “premium steel” says little about suitability unless the exact alloy, heat treatment, edge geometry, and application are defined. Common choices for industrial paper knives include tool steels such as D2/SKD11, high-speed steels such as M2 or M42, and selected tungsten-carbide grades. Their practical advantages depend on abrasion, toughness, chip resistance, ease of regrinding, cost, and the stability of the holder.
D2 is a high-carbon, high-chromium tool-steel family with good wear resistance when correctly processed, but it is not automatically superior in impact resistance or fine-edge stability. HSS can be a strong choice for demanding repeated cutting and is commonly specified where the combination of hardness and resistance to edge degradation is valuable. Carbide offers high potential wear resistance for suitable abrasive applications but demands appropriate grade selection, edge preparation, support, and care against chipping. None of these descriptions justifies a guaranteed percentage increase in life.
| Material family | Potential purchasing advantage | Main engineering caution | When to request a trial |
|---|---|---|---|
| D2 / SKD11 tool steel | Familiar wear-resistant tool-steel option; regrindable in suitable designs | Toughness, edge preparation, and treatment quality vary | Established paperboard application with repeatable wear |
| M2 HSS | Balanced candidate for precision paper-converting knives | Price and performance depend on profile and treatment | Frequent regrinds or demanding continuous running |
| M42 HSS | Alternative HSS grade for specialist wear conditions | Greater cost is not proof of lower total cost | Current edge wears rapidly despite correct setup |
| Tungsten carbide | High wear-resistance potential in stable supported applications | Brittle edge failure, grade and mounting sensitivity | Abrasive substrate, long campaigns, controlled mechanics |
| Application-specific alloy or coating | Potential to address wear or pickup selectively | Coating compatibility, sharpening, and lead time | Documented defect not solved by standard grades |
Do not compare blade quotations only by HRC. Hardness testing methods and scales vary with material, and two knives at the same nominal hardness may differ in toughness, microstructure, edge finish, and manufacturing accuracy. GUANG CHUAN's cardboard blade product listing gives application-specific options rather than a universal grade rule. If a supplied datasheet lists flatness or runout values, confirm the actual measurement datum, unit, scope, and agreed inspection criteria before using those figures as acceptance limits.
A structured comparison trial should hold material lot, machine, speed, setup, sample length, and acceptance criteria constant as far as practical. The winning knife is not necessarily the one that runs longest; it is the one with the lowest cost per accepted unit while meeting edge and safety specifications throughout its campaign.
The phrase paper converting knives covers more applications than a slitter rewinder. There are rotary knives for thermal receipt rolls, label face stock, coated paper, kraft reels, tissue, folding board, paper tubes, and multilayer constructions. Some are longitudinal cutters, some are transverse cutters, and some work in dedicated tube-cutting heads. Mounting and geometry must match the specific operating principle.
| Application | Likely quality priority | Key information for blade selection | Frequent source of confusion |
|---|---|---|---|
| Printing and writing paper rolls | Low lint, straight edges, stable winding | Paper grade, thickness, speed, web path, paired knife details | Buying by nominal diameter only |
| Thermal and specialty paper | Minimal coating debris and edge damage | Coating structure, tension, cut profile | Assuming ordinary uncoated-paper settings apply |
| Label stock and release liner | Controlled cut through the intended layers | Laminate structure, adhesive, liner requirements | Confusing full-depth slitting with controlled-depth cutting |
| Kraft and packaging paper | Clean edges through varying strength and furnish | Web tension, basis weight, trim handling | Compensating for unstable web by extra overlap |
| Solid paperboard | Fiber separation without excessive crush | Thickness, ply structure, support, blade geometry | Using tissue-style thin-edge assumptions |
| Corrugated board | Avoided delamination and crushed flutes | Flute grade, orientation, machine cutter architecture | Interchanging slitter-scorer tooling with shear rewinder knives |
| Paper tubes and cores | Square ends and limited end-face fuzz | Core diameter, wall thickness, winding construction | Treating a tube cut as ordinary web slitting |
For tube production, GUANG CHUAN offers a separate HSS circular paper tube cutting blade range. Buyers should distinguish that application from continuous longitudinal shear slitting. A tube cutter may have bolt-hole mounting, different support requirements, and an entirely different cutting path. Similarly, the company's circular slitting and rewinding blades category is a useful starting point for product discovery, not a substitute for a dimensioned RFQ.
A troubleshooting trial becomes persuasive only when “better” has a repeatable meaning. Begin with simple observations: inspect the same slit position at startup and after a defined length, photograph the edge at a fixed magnification, count conspicuous fiber projections in a defined sample window, and weigh collected dust when a practical, safe collection system allows it. Document sampling position, speed, material lot, knife condition, and any extractor changes.
One useful trial metric is collected dust mass per kilometer of slit. If mass can be sampled reproducibly for one knife lane, calculate: dust rate = collected dust mass in milligrams divided by web length in kilometers. Another option is dust mass per kilometer of total cut length summed over all active lanes, but state clearly which denominator is used. Never compare a one-lane result with a six-lane result as though the tests were equivalent.
For example, imagine two controlled tests on the same paper grade, machine, slit position, and collection fixture. The baseline sample yields 250 mg of dust across 5 km of a single slit, or 50 mg/km. After correcting a verified overlap problem, the sample yields 150 mg across the same length, or 30 mg/km. The arithmetic change is (50 − 30) / 50 × 100 = 40% lower collected dust rate. These are illustrative numbers, not measurements made by GUANG CHUAN and not a promise of performance. Their value is to show an auditable testing method.
| Sample | Collected dust | Length per sampled slit | Calculated dust rate | Interpretation |
|---|---|---|---|---|
| Baseline, hypothetical | 250 mg | 5 km | 50 mg/km | Illustration of starting condition |
| Revised setup, hypothetical | 150 mg | 5 km | 30 mg/km | Illustration of lower rate |
| Arithmetic comparison | 100 mg less | Equal length | 40% lower | Not independently verified factory data |
Add an edge-quality score. A practical internal scale could define 0 as no visible attached fibers at the agreed magnification, 1 as occasional short projections, 2 as repeated visible fraying, and 3 as an unacceptable continuous fuzzy or torn edge. This is a proposed plant-specific rubric, not an ISO standard. Train inspectors on reference photographs and review both sides of the slit. For critical products, use a microscope, image analysis, or customer-approved sampling specification.
Do not ignore reproducibility. Weighing very small dust masses can be distorted by balance resolution, static, humidity, contamination, and inconsistent extraction. Record the collection fixture and keep it unchanged. A material with an intrinsically different coating cannot fairly be compared without a lot-controlled experiment. When claims influence purchasing, take repeat samples and report the range, not only the best run.
A trial matrix is most effective when it separates the contribution of setup from the contribution of blade manufacturing. Begin with a known-good recipe and inspect all safety-critical parts. Establish baseline edge quality at normal production duty. Then test one permissible change at a time, with written machine approval where required. For a knife-material trial, restore the same baseline conditions before testing the candidate blade.
The first phase should confirm that the machine can produce a clean slit with an existing approved knife pair. The second may evaluate an improved ground finish or restored profile. Only after these checks should the team compare alternative materials, altered bevel sections, coatings, or paired knife assemblies. This avoids paying for a premium alloy to compensate for a loose holder or incorrect cut-point position.
| Trial stage | Variable intentionally changed | Hold constant | Acceptance measure |
|---|---|---|---|
| Baseline | None | Paper, knives, speed, setup | Dust, edge score, scrap, interruptions |
| Setup verification | One approved overlap or side-force adjustment | Same paper and knife pair | Quality plus machine stability |
| Edge-condition test | Reground or verified new equivalent profile | Same approved setup | Initial quality and wear trend |
| Material comparison | Knife steel or carbide grade | Profile and system settings as closely as practical | Accepted length before service |
| Profile evaluation | Controlled cross-section revision | Tool grade and other settings | Edge quality, wear, and safety |
| Production confirmation | Normal operating campaign | Agreed recipe and sampling plan | Total cost per accepted output |
Ask a supplier for a written drawing revision and manufacturing inspection data whenever profile or mounting dimensions change. A “trial knife” with undocumented geometry creates uncertainty even if the first samples look good. Keep baseline and trial knives identified so the plant can repeat the results and so future reorder batches have a stable specification.
Replacing a blade because the slit looks poor is understandable, but it is not always the most economical response. Many tool-steel and HSS knives can be professionally reground when the body is sound, sufficient material remains, and the original geometry can be restored. Conversely, a cracked, distorted, severely chipped, or undersized blade should not be returned to production simply because an operator can make the edge feel sharp.
The decision should incorporate the minimum approved OD, remaining thickness, bore condition, contact-face flatness, runout, chip depth, and the number of previous grinds. Regrinding changes dimensions and therefore may affect the installed cut point or holder range. On matched pairs, a changed upper diameter and worn lower-ring face may prevent an otherwise acceptable regrind from achieving the desired quality.
A useful service log records the knife ID, grade, original and current dimensions, date installed, substrate, production length, reasons for removal, condition after inspection, material removed during grinding, and inspection approval before reuse. Looking across several cycles reveals whether wear accelerates with a certain paper grade or whether one knife station repeatedly damages the edge.
GUANG CHUAN discusses these decisions in When Should Circular Slitter Knives Be Resharpened or Replaced?. For paper operations, the underlying principle is the same: restore a sound, in-tolerance tool when practical, but replace one that can no longer cut safely or predictably. Handling practices matter too. Use edge protection, separate storage positions, and clean mounting seats; an expensive precision knife can be chipped before it ever sees the web.
An improved knife can reduce dust generation, but cutting-process control and safe dust management must work together. A poorly directed extraction nozzle may disturb the web, while inadequate capture permits paper particles to settle on equipment or travel into finished rolls. Design the capture point so it removes waste without changing the cutting geometry or pulling the slit edge out of its intended path. Check trim transport as well as local dust suction.
Paper and pulp dust may present combustible-dust hazards under relevant conditions. The U.S. Occupational Safety and Health Administration identifies paper and pulp among materials that can create explosible dust in its combustible dust overview. Its hazard communication guidance emphasizes suitable containment, housekeeping, and avoiding actions that disperse dust into the air. The appropriate control program depends on the material, facility, local requirements, and hazard assessment.
Do not blow accumulated fine dust around the slitter with unassessed compressed air. Use suitable collection and housekeeping equipment selected through the facility's safety process, and follow lockout and guarding requirements before accessing knives. Dust extraction must be designed for the applicable hazard; adding an ordinary vacuum to a process with combustible dust risk is not automatically safe. Blade purchasing advice is not a replacement for a site-specific safety assessment.
For quality improvement, collect dust samples at designated points and examine whether cleaning frequency changes after the intervention. Record any production interruptions from plugged filters, lost trim, and contamination events. This captures the business value of cleaner cutting without pretending that knife metallurgy alone solves the entire housekeeping problem.
A lower-priced knife may become expensive if it requires more frequent changes, creates excessive scrap, or needs repeated setup corrections. A higher-priced knife is not automatically economical either. Commercial comparison should include knife purchase and regrinding, planned and unplanned downtime, operator labor, accepted production, and contamination-related waste. Build the calculation from actual plant data rather than a supplier's unsupported “three times longer life” statement.
A simple normalized comparison is enough to reveal the tradeoff. Assume, for illustration only, that Knife A costs $35 and operates 8 hours before planned replacement, while Knife B costs $65 and operates 20 hours. Each change requires 12 minutes, and the plant attributes $150 per hour to lost production availability. Over a normalized 100 running hours, the expected knife consumption is 100/8 = 12.5 units for A and 100/20 = 5 units for B. Fractional units represent a long-run average, not literal half-blade purchases.
| Illustrative metric over 100 running hours | Knife A | Knife B |
|---|---|---|
| Knife unit price | $35 | $65 |
| Expected life per knife | 8 h | 20 h |
| Normalized knife consumption | 12.5 | 5.0 |
| Knife cost | $437.50 | $325.00 |
| Changeover time at 12 min/change | 150 min | 60 min |
| Downtime value at $150/h | $375.00 | $150.00 |
| Combined modeled knife + downtime cost | $812.50 | $475.00 |
| Modeled difference | — | $337.50 lower per 100 running hours |
These inputs are invented examples to explain the method, not actual GUANG CHUAN pricing, measured life, or guaranteed savings. They also exclude grinding, labor accounting differences, material losses, quality inspection, and the value of accepted output. In a real purchasing case, normalize the comparison to accepted linear meters or accepted rolls, not merely scheduled operating hours, especially if defective output differs between trials.
A complete proposal should state the existing problem, measurement method, observed baseline, proposed blade change, confirmation run, and expected reorder specification. That documentation gives the purchasing department a defensible reason to choose the qualified knife rather than the lowest unit quote.
A useful request for quotation allows the supplier to determine both manufacturing fit and application suitability. Start with the machine make and model, knife position, shaft or holder type, and an existing drawing if available. Attach photographs of the blade profile and mounting arrangement, plus a protected sample if drawings are incomplete. Specify dimensions and tolerances rather than asking for a knife that merely “looks the same.”
Then describe the material: paper or board grade, grammage, thickness, coating, number of layers, moisture data if applicable, roll width, target slit width, speed range, operating shift pattern, and whether the system is shear, score/crush, or razor. Name the current defect precisely: fine dust, long fibers, uneven edges, repeat marks, delamination, or excessive wear. State whether the problem affects one or all lanes and when it begins.
| RFQ field | Information to supply | Why it prevents commercial mistakes |
|---|---|---|
| Machine and holder | OEM, model, upper/lower knife position, rotation direction | Confirms installation architecture |
| Mechanical drawing | OD, ID, thickness, bolt holes, keyways, spacers, tolerances | Prevents non-fitting replacement parts |
| Edge cross-section | Bevel reference, primary/secondary relief, contact face | Avoids incorrect knife orientation or cutting profile |
| Existing tool condition | Steel grade, heat treatment, grinding history, photographs | Supports an informed comparison |
| Substrate | Paper type, GSM, thickness, coating, board structure | Helps select profile and edge material |
| Operation | Line speed, slit width, web path, current validated setup | Relates tool design to actual working conditions |
| Defect evidence | Photographs, sample rolls, dust and edge metrics | Makes the improvement target testable |
| Commercial requirement | Trial quantity, target life, inspection documents, volume | Enables sampling and repeat-order planning |
For supplier research, review the GUANG CHUAN paper-converting upper and lower knife range, precision cardboard slitting blades, and paper tube cutting knives. These are different application families. The company's About Us page describes custom manufacturing based on technical drawings and physical samples; an RFQ should still identify which exact tolerance and performance criteria will be contractually accepted.
A paper converter sometimes orders only the visible upper blade because it seems to be the wearing component. That may be appropriate when the lower knife is still within specification. But if the lower ring has a damaged contact face, excessive runout, mounting wear, or an unsuitable hardness relationship, a premium upper blade may wear quickly and reproduce the same dust pattern.
A matched-set review considers both knives as a working system. Examine the lower-ring face, concentricity, material compatibility, spacer stack, and the condition of the holder that applies side load. Determine whether the new upper knife is actually contacting the intended location. If the lower tool has been repeatedly reground, make sure the resulting geometry remains consistent with the machine's operating envelope.
This is particularly important in multilane production. One knife station may contain a replacement from a different manufacturing batch with a subtly different bevel or finished diameter. The result may be a single defective lane surrounded by acceptable lanes. Comparing measured dimensions and profiles can reveal the issue faster than modifying machine-wide settings.
GUANG CHUAN's upper/lower slitter knife explanation is a useful internal resource when deciding whether to order a replacement upper knife, a lower knife, or a coordinated set. Request pairing information and measurement records when your application needs tightly controlled geometry across many positions.
The common contributors are worn or burred edges, excessive overlap, excessive side force, poor cut-point geometry, blade-to-anvil rubbing, unstable web tension, runout, and the paper's own coating or filler characteristics. The first action is to compare the defect across lanes and time, then check the approved machine baseline. A dust problem does not, by itself, prove the blade steel is defective.
A correctly selected and finished knife can reduce avoidable dust, but zero dust is not a universal mechanical outcome. Some fibers and coating particles may detach even under an optimized process. Any “dust-free” requirement must define substrate, collection method, sampling length, detection limit, and acceptance threshold before it can be verified.
There is no single worldwide setting. Published examples include about 0.030–0.040 in in DIENES technical guidance and 0.030 in in a particular Tidland knifeholder procedure. They are contextual references, not blanket machine instructions. Use your OEM's approved limits and a controlled trial, because too much overlap can increase dust and too little can destabilize the cut.
A new knife may have the wrong bevel orientation, a grinding burr, inappropriate relief, poor mounting fit, or incompatible mating geometry. The cause may also be outside the knife: web flutter, a damaged lower ring, excessive side load, or a new paper lot. Verify the complete cutting system before rejecting the blade or requesting an arbitrary harder material.
No. HSS and D2 are both useful families, but their performance varies with grade, heat treatment, sharpening, holder conditions, substrate abrasion, and service interval. A controlled trial should compare accepted production and total cost, rather than assuming a particular steel grade always produces a cleaner edge.
Carbide may offer useful wear resistance in a correctly supported application, but brittle chipping and installation sensitivity can outweigh that advantage. Supply the machine drawing, grade of board, current wear pattern, and holder conditions before choosing a carbide design. A tougher steel or improved setup may be the better commercial result.
Fraying leaves fibers attached and projecting from the cut. Crushing shows compacted or distorted paper, sometimes with an uneven compressed band. Corrugated board can show a third pattern: layers separating or flutes collapsing. Inspect both sides and, where necessary, a cross-section before choosing a different knife profile.
Sharpen when the documented quality and condition thresholds are reached, not at one arbitrary number of operating hours. Different paper grades and coating abrasiveness can produce very different service intervals. Keep a history of accepted length, edge condition, grinding removal, and dimensional measurements; replace knives that cannot be restored within safe limits.
They can both be circular tools, but the intended machines and mechanical loads may differ. Paper-rewinder shear knives usually work as a defined upper/lower system for continuous webs. Cardboard slitter-scorer or tube-cutting knives may use different mounting, support, pressure, and geometry. The correct purchasing category follows the machine's cutting method and drawing, not the name alone.
Send the machine model, existing knife drawing or sample, upper/lower position, OD/ID/thickness, bevel orientation, material grade, paper or board specification, typical running speed, quantities, and photographs of defects. Explain whether your priority is less dust, reduced paper edge fraying, longer service life, lower changeover frequency, or several of these at once. A supplier can then propose an application-specific trial and a measurable inspection plan.
Reducing dust, fraying, and rough edges starts with an accurate diagnosis. Knife sharpness matters, but so do the mating lower edge, bevel orientation, overlap, side force, web path, substrate condition, grinding quality, and maintenance practice. The strongest solution is one that can be repeated across shifts and reorder batches while meeting the required finished-roll specification.
GUANG CHUAN manufactures industrial circular slitting and converting knives, including customizable upper and lower knives, HSS cardboard blades, and paper tube cutting tools. If your line has persistent lint, edge tearing, irregular slit quality, or short blade life, send the current tool drawing or a sample together with paper specifications and photographs of the defect. The technical discussion can then focus on fit, geometry, material, inspection, and trial acceptance rather than a guess about the “sharpest” knife.
Request an application-specific quotation: Contact GUANG CHUAN or email 13285553934@163.com. Include your machine model, paper grade, current knife dimensions, production speed, and the exact edge defect you want to reduce. A well-documented inquiry is the shortest path toward a replacement knife that solves the right problem.

Leave A Message
Scan to WhatsApp :

 English